Successfully filling holes in a stone is not difficult, however, it is dependent on understanding the following things:
- Holes in natural stone are a common thing to see because stone formation is a highly variable process of nature. These are not faults, they are natural characteristics.
- Holes in natural stone may not exist on day 1, but may appear later due to natural stresses of temperature changes, structural movement, etc.
Here are some options to consider:
Option 1: Fill the hole with a colored material that is the same as the stone so that the hole is not visible.
This can be difficult because of the issue of color matching. If you chose this option, check tile and home improvement stores for colored caulking in the tile sections. Sometimes matching the grout color can be acceptible.
There are more specialized "poly type" fillers available for filling granite, but the color matching problem is just as difficult.
Option 2: Fill the hole with a clear material so that the appearance does not change and dirt cannot enter it. Therefore, it becomes easier to keep clean. Some major advantages to this method is that the hole is retained as a natural visual characteristic instead of seeing a patch, and the hole is gone as far as dirt entrapment. Here are the options within this catagory:
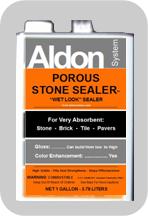
- A: Because of its very high solids level and that it is clear in color, the best product to achieve filling from Aldon is "Porous Stone Sealer".

Following are some tips to make this process easier:
"Porous Stone Sealer" is in gallon cans and small amounts of liquid can be applied with a plastic straw . For small amounts, you can order one fluid ounce bottles of "Porous Stone Sealer" from our sample ordering page at: samples
- Fill the hole by pouring the sealer from a small dispensing container. A paper cup can crimped to create a pour spout and the liquid does not effect a paper cup.
- It may take a few applications to achieve filling because the sealer may penetrate down or sideways and the liquid level drops below the level of the surface.
- Use something (piece of wire, paper clip) to insert into the liquid and break any air bubble created. Then add more liquid until hole is full.
- Let the sealer cure for 3 hours or more between applications and it will take fewer applications to achieve buildup.
- Very cold temperatures (below 50 degrees F.) will slow down the sealer drying time. It may feel tacky for many hours. Wait until no longer tacky before next application.
- Build to slightly higher than the surface and do not be too concerned about overflow and the glossiness it creates around the hole. That will be corrected later in the process.
- Allow 24 hours (or more per above ) for curing, then use #0000 steel to polish down to the level of the surface. This may dull the gloss a bit, but that is ok and will be corrected with the final step.
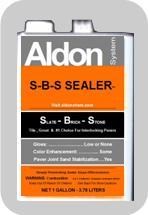
- If the "0000" steel wool sanding has dulled the gloss and you want to recreate the gloss now that the hole is filled, you can seal the entire surface with more Porous Stone Sealer or, if the surface is low in absorption, with Aldon "S-B-S Sealer" .

- B: (If the hole is too large for Option A.)
-
Fill the hole with a
clear caulking
that is rated as "paintable." The paintable designation is so that if a sealer is applied later, it will be able to adhere to the caulking.
- Apply caulking and wipe smooth immediately without pulling from the hole. Leave it a little higher than the surface for now.
- After it has cured (per caulking label), use #0000 steel to bring level to the surface. Sometimes lacquer thinner can be used on a rag to aid this finishing.
- After the caulking process is complete and cured, the surface can be sealed as described in Option "A" above.
Some tips for this process: